This post contains affiliate links. Please see our disclosure policy.
This is the gf bread you will want to make! And as I mentioned before, Keep that Steam in the picture someway or the other to get a absolutely moist and fresh bread! My current diet preference is because of ethical and health reasons. But there are several who dont have a choice to choose what they eat. Be it any kind of limitation, health, financial or other. Whichever the case, I’d like to think that it is not about giving something up, it is about replacing it with something slightly different, maybe even better. We didnt “give up” dairy, just replaced it with something much more nutritious!
The same thought of not missing out on anything(something I picked up from the ever vivacious Cara), keeps me motivated to try these gf yeast breads. If one day, I couldn’t eat gluten, would I eat this bread? hell yes!
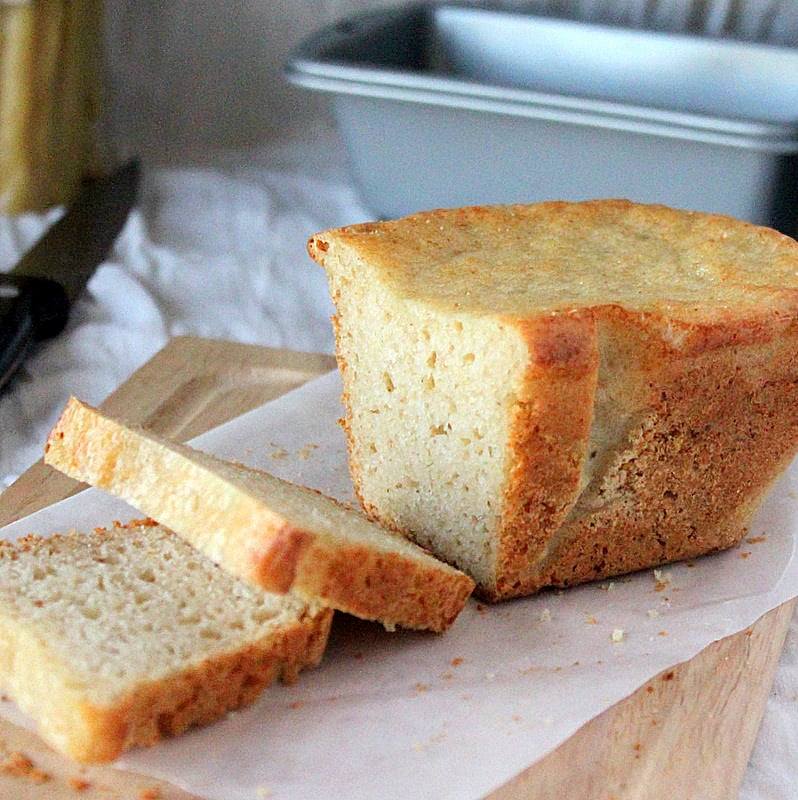
Gluten Free Vegan White Bread Loaf
Ingredients
- 6 Tbsp oats, ground (1/4 cup +2Tbsp)(All flours starches are Bob's red mill)
- 1/4 cup brown rice flour
- 1/4 cup potato starch
- 1 Tbsp tapioca starch
- 1/4 cup warm water
- 1 teaspoon active yeast
- 2 tsp raw sugar
- 1 tsp agave syrup
- 1.5 Tbsp non dairy yogurt, So Delicious plain coconut milk yogurt or make your own cultured Nut Milk -Cashew Yogurt
- 1/2 teaspoon salt
- 2 teaspoons oil
After first rise:
- 1-1.5 Tablespoon potato starch, or half potato starch and half ground oats
Instructions
- Warm the water and add yeast and 1 teaspoon sugar to it. Mix well and let it get frothy. 8-10 minutes.
- In a bowl, whisk all the dry ingredients well.
- In another bowl, lightly whisk the oil, yogurt, agave and sugar until well combined.
- Add the dry ingredients and the yogurt mix to the yeast mix and whisk to combine well. The dough will be more of a stiff batter.
- Let it rise for 1.5 hours or until doubled.
- The oats will make the dough less battery after the first rise, but it will still be sticky.
- Add some potato starch to make it less sticky and dump the sticky dough into parchment lined mini bread loaf pan. Even out using a spatula.
- If you want to make dinner rolls, use just enough potato starch and oats flour and use oiled hands to quickly make small balls(a few Tbspns). Place balls touching each other in parchment lined stoneware for baking or round cake baking pan if steaming. See GF Dinner rolls
- Spray top with water, and then with oil or dust with Oat flour.
- Prepare steaming pan, warm the water, switch off and place the bread pan in the steamer. Cover and let rise until doubled. (20-35 minutes)
- Start up the steamer and steam for 20 minutes or atleast half the total bake time.
- Meanwhile preheat the oven to 395 degrees F. Take the pan out of the steamer after 20 minutes and immediately place in oven.
- Bake at 395 for 12-17 minutes to just about brown the edges. Dont over brown it. steamed breads will not brown easily and then directly become too crusty.
- Let bread cool outside the pan for 15 minutes before slicing.
Notes
Nutrition
Nutrition information is automatically calculated, so should only be used as an approximation.


This looks amazing! Thank you for sharing 🙂 have you by any chance made a bigger loaf and have rhe measurements so that I don’t have to do the math?
Yes, Richa, the yeast did foam when I mixed it in the water/sugar. . . I guess you can say it almost doubled? The bread rose pretty nicely (although still not to the rim) when I checked it out after the 2nd rising (just before I turned on the steam). It shrank slightly when I opened it after the steaming. It didnt shrink at all after this (even after baking it in the oven. I am wondering about the dough. Wonder if it should’ve been more wetter/stickier. It reminded me a lot like regular gluten dough. Not too sticky . . . just like regular dough almost if you know what I mean. You said to add 1 to 1.5 TBSP more flour at the end. . . I really didnt feel I needed it cuz it wasnt really stucky to me. Maybe next time, I could try a different/new yeast.
if the yeast was so foamy, then it is working fine:) sorghum also tends to make the dough dense. all flours act differently and the water content and starch content needs to be adjusted a bit. For denser flours like sorghum, millet you need extra starch to help the dough hold the airyness. If it did turn out like a regular gluten dough then you are on the right track!:)
Hi Richa!! I finally got a chance to make these! They definitely dont have the pores that your bread does! Also, the dough didnt even go all the way to the top of the pan (used exact size as yours). I followed the recipe EXACTLY, but instead of rice flour, I used sorghum flour. I steamed using my pressure cooker. It tastes really, really yummy and chewy though but definitely does NOT look like yours. In fact, my quick bread I made yesterday rose much more than this (also used the mini loaf)
My bread reached till just about the edge of the pan. The bread can rise and fall if the consistency is too battery or if the heating got interrupted.
If there were no pores, then the only thing i can think of is the yeast. Did the yeast froth when you added it to warm water? Also, did the dough rise before you put it to steam?. you can also add a little baking powder to the oats to help the rise if you are not sure about the yeast.
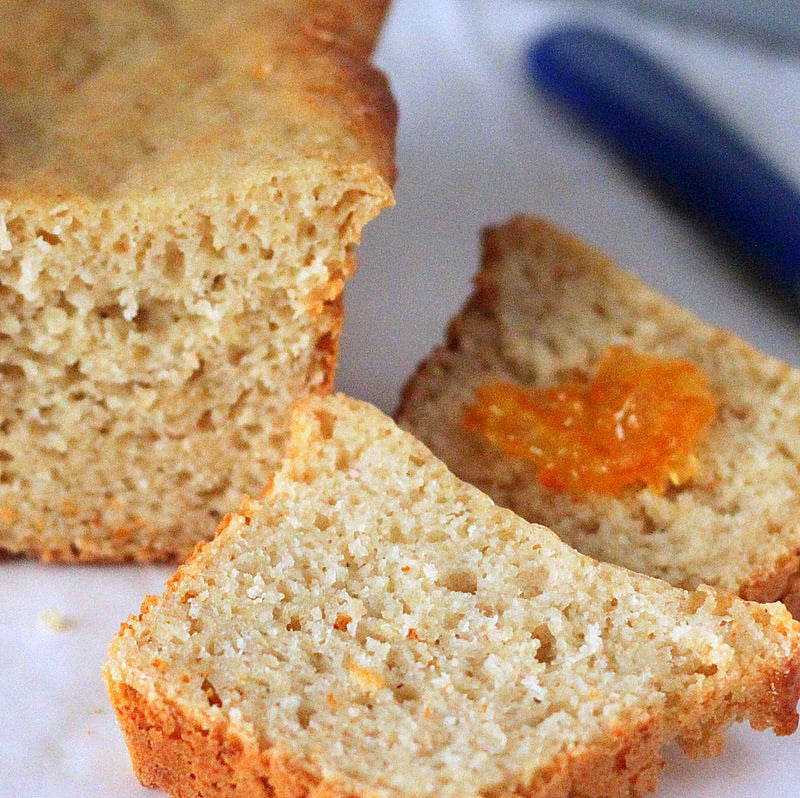
Oh my gosh the bread looks like regular wheat bread ! Can you post a picture of what the dough is supposed to look like once its all mixed? I find it varies for every recipe almost. Also, I thought gluten free brea only needs 1 rise, not like regular gluten flour bread? Maybe someone can give me some info on this as I may just not quite understand it. Do you think I can use the quick rise yeast, which only needs one rise to get this result??
Hi Farzana, Thank you for dropping by:) you can look at the dough pictures on my glutenfree naan post or the glutenfree focaccia bread post https://hobbyandmore.blogspot.com/2012/03/gluten-free-zucchini-basil-focaccia.html
There is a before rise and after rise dough picture. The dough i usually like is a stiff batter. Yes, you might not need a double rise with most gf flours. I am using Oats in this and they tend to absorb a lot of moisture depending on the type. The double rise also gives you a chance to adjust the dough if needed after the first rise. If it is too soft, you can add more flour/starch, if too dry, then add in water.
Quick rise yeast will just rise a bit quicker to double in volume. I would suggest trying the double rise to see the dough if it is rising to almost a double rise in the first rise. If using just one rise, then add a bit more water.
Let me know if you do try it:)
Thanks Richa! I will definitely check it out! Thanks for the info on the double rise 🙂 I do have a question regarding the steam bath. You say:
“Prepare steaming pan, warm the water, switch off and place the bread pan in the steamer. Cover and let rise until doubled. (35-45 minutes)
Start up the steamer and steam for 20 minutes or atleast half the total bake time.”
So basically, I can place the loaf pan in any sorda big pot with lid and a small hole and let it sit in there for 20 min with the lid closed? Would I have to boil the water? What do you mean when you say “switch off”?? Thanks so much! What a great idea!
Hi Farzana, the switch off is to switch the heat off once the water bath is warm. For the second rise, you want the dough to be in a warm place. You can either just put it in a warm oven or in a warm water bath. Once rise to almost double(which will depend on the ambient heat and yeast, anywhere from 20 to 30 minutes), steam the loaf any way you can. In a stove top steamer, or any pot filled with water and a lid with a hole to let the excess steam out. Steam for 20 minutes then bake until required crust color.
How hot should the water bath be? Boiled water or is that too hot? Usually, I use just hot running water from the tap, fill my kitchen sink up. Place my pot in there and my loaf pan in that (of course there is a lid). I am still trying to figure out the steam idea. I guess I can use the same pot, which has a hole and lid and place my loaf pan in there. Do I place water under this (lets say on a baking tray or something) to give it the steam?? Also, I have a mini loaf pan size 5 3/4 x 3 x 2″. Is this the correct size? Thanks so much, RIcha. I will get there! I really wanted to try making this tonight 🙂 I have never tried steaming a loaf of bread before so its all new to me.
I swear, this will be my last question: First you say “prepare steam and place in steamer and cover and let rise”. Then again you say “start up steamer and steam for additional 20 minutues”.
Could this have been a mistake? Maybe you meant “prepare warm water bath” instead of “prepare steamer”? Am I missing something??
Hi Farzana, No problem. I have to make a newer post with step by step pictures. 🙂
Let the bread rise in any warm environment, water bath, warm oven and then proceed with the steaming.
Here is a picture of my steamer pot from another post https://4.bp.blogspot.com/-eZ7XsJEfcvM/T3vrbDM-myI/AAAAAAAAFjc/c7Ef2Slsb0M/s1600/dhokla-pretzelbites%2B001.JPG
Its just a big pot with 1-2 inches of water and a lid. I place the bread pan in the pot, in the water. Cover with the lid and put the pot on high heat. The water will start to boil in 5 or so minutes and steam will develop inside the pot. You can also use a pressure cooker to steam if you have used one before.
The pot should be able to fit your bread pan in length as well as height.
If you would rather steam in the oven, Then use a big baking dish and add 2 inches of boiling water in it. Place the bread pan in the boiling water. Use aluminium foil to make a dome over the baking dish and seal it. Bake this at preheated 400 degrees F for 30 minutes. Them remove the foil and remove bread pan from the water, place it on the oven rack, and continue baking for another 10 minutes.
sorry to confuse you even further. Let me know how it works out.
Hey Richa! Oh my gosh, I get it LOL ! So high heat for the 20 minutes for steaming. Thanks sooooooo much. I couldnt make it today cuz I just got your reply now so hopefully I get a chance this week! I will let you know what the result is for sure. Cheers 🙂 (yes, a step-by-step to include pictures would definitely be VERY helpful for people like me LOL)
Hoping to finally make this at the weekend!
Do you think I could use dairy yogurt? I’m guessing the only reason for non-dairy is if we’re sensitive to it – not that it’s properties effect the bread differently?
Yes, you can use the dairy version. The yogurt helps keep the bread soft and moist. any creamy yogurt will work.
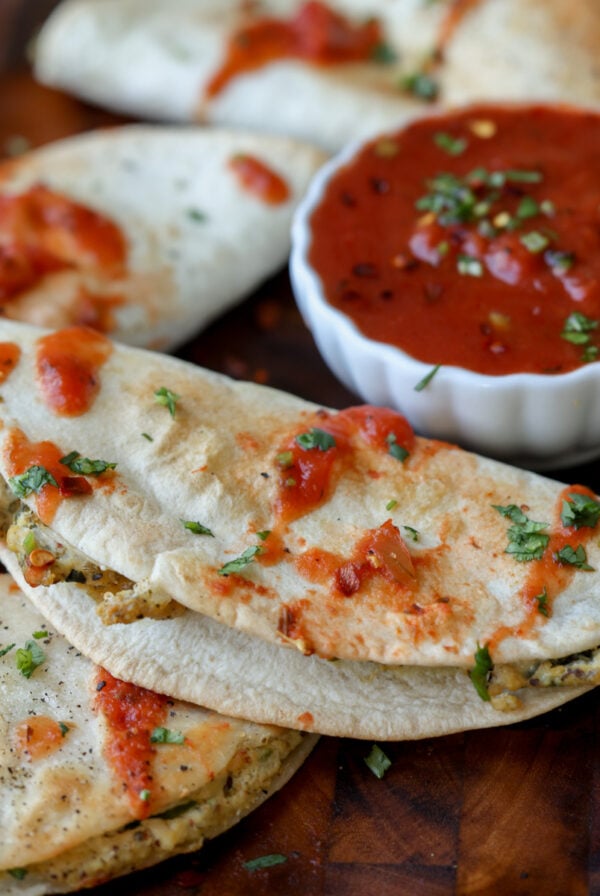
I still haven’t made this yet! BUT I might take your advice and make a pizza base with it – always on the look out for great GF pizza bases!
This is quite a wet dough. You will need to add a bit more oat flour after the first rise, so it doesnt collapse under the toppings..and then work quickly:) Let me know how it works out.
If you can, then steam the flatbread to almost done(20 minutes for 9-10 inch), then top it and bake on high temp or lo broil. Then it wont be as crumbly.
Oh, this looks great. I definitely want to try it. Not sure how I can set my oven to 395 degrees, but I can do 400.
Thanks Ellen. 400F will work fine!
Thanks for sharing this recipe on Allergy-Free Wednesdays. Hope you’ll come back this coming Wednesday with another fabulous recipe!
Thanks Janelle.
those pores on the bread looks perfect! cant believe its GF