This post contains affiliate links. Please see our disclosure policy.
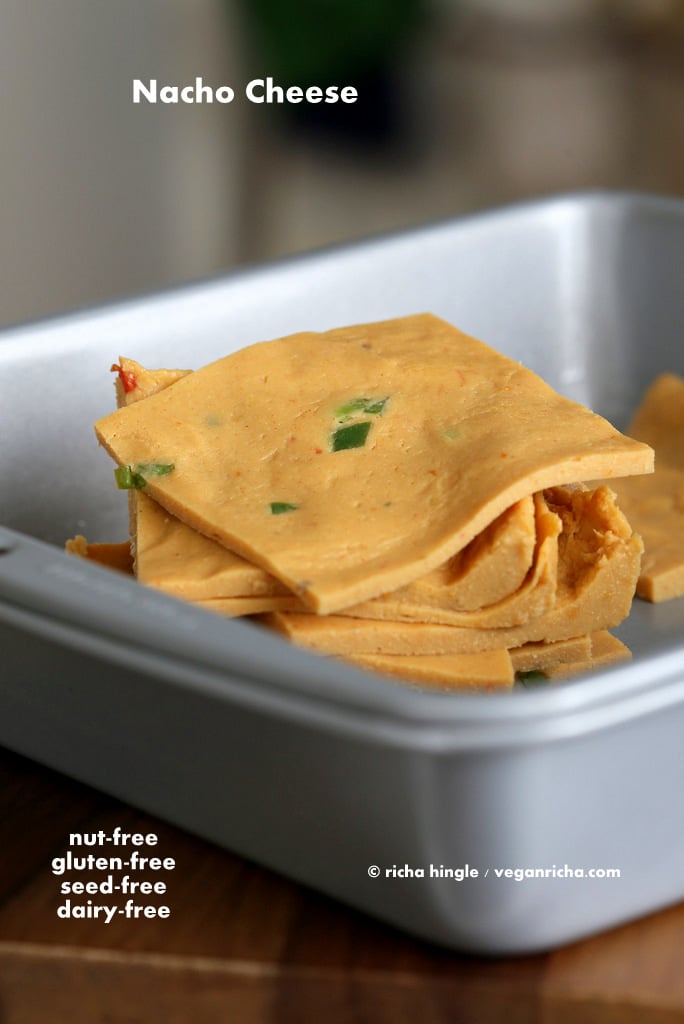
This Nut Free Vegan Nacho Cheese is simple, makes wonderful slices and does not use any agar to set. Find the secret ingredient and make some today. Jump to Recipe
Another crazy creation your way! After using up my almond milk pepper jack, I was wondering about changing up the whole thickening game. Agar and starches and all 🙂 I was also making some Chickpea tofu that week and the texture and setting capability of chickpea flour was staring me in the face.
So in comes Chickpea flour to the rescue once again! Chickpea flour has great thickening and setting properties. With all the added flavors for the nacho cheese, this cheese works out perfectly. You can also use it to make other cheese flavors that have sharper or complex taste profiles that compliment the custard-y chickpea flour taste. It might not work for the simpler mozzarella or ricotta, as the stronger flavors help dumb down the chickpea flour taste.
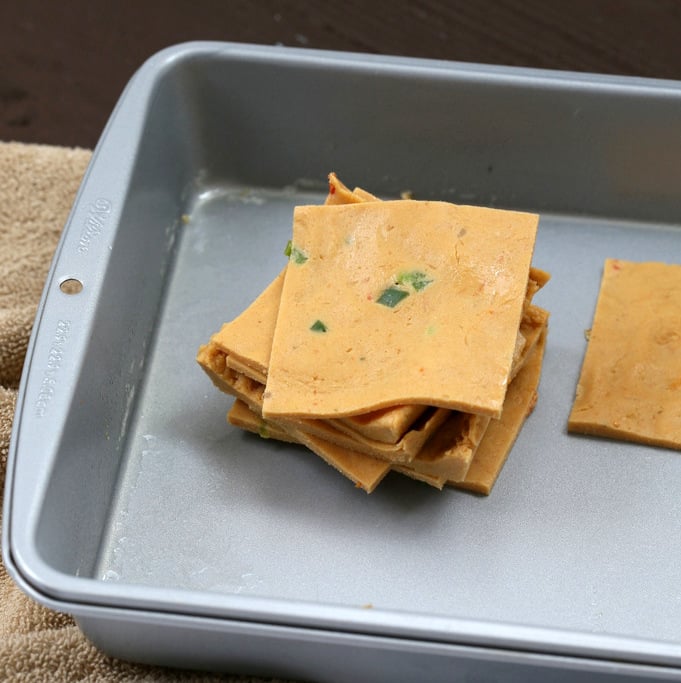
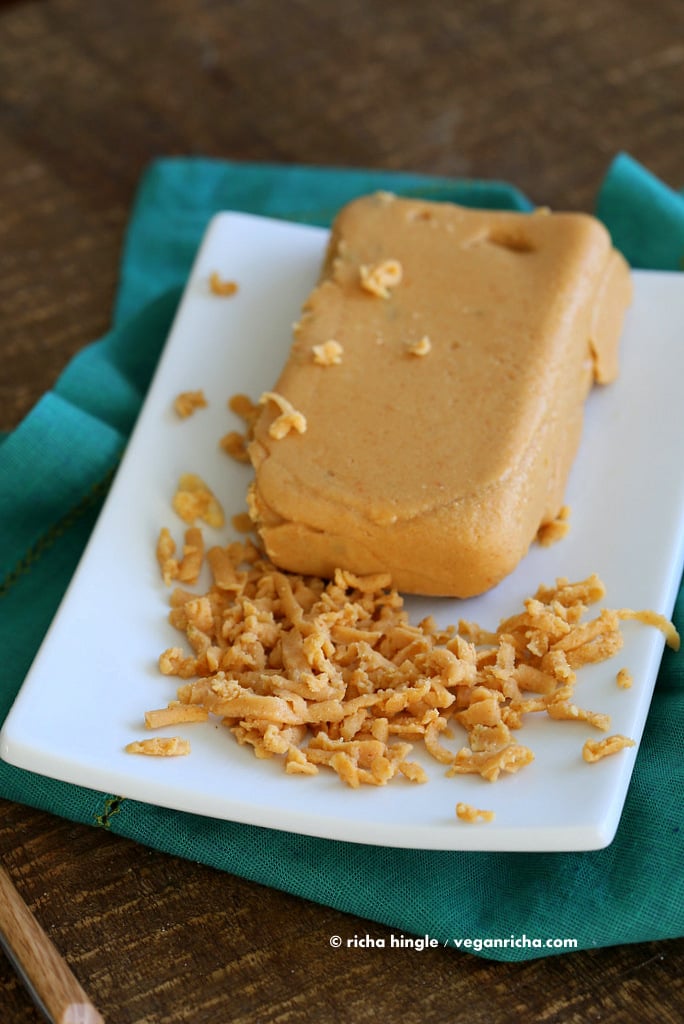
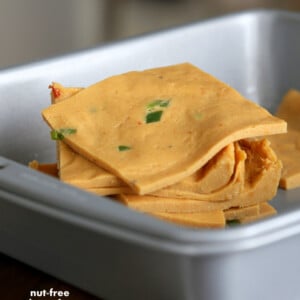
Also, this cheese is not going to melt into a puddle. It becomes custard like at high heat and sets again quickly as it cools. You can make slices or make a block of cheese and shred it and use. There is no oil in the cheese either. You can add some for greasy-ness if you like.
The ingredient list might look long, but its mostly spices and flavors. You can try make a less ingredient cheddar with nooch, sundried tomato, garlic, miso and prepared mustard. As with any recipe, if you do not like it, do not throw it away :). Shred and add to my chickpea omelet.
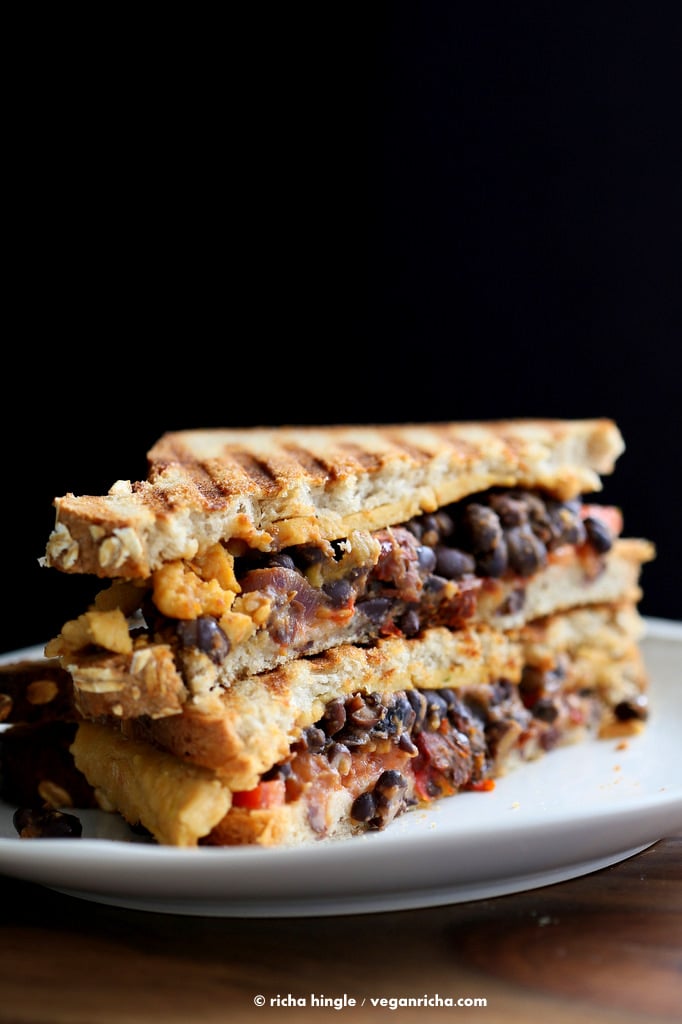
These Nut Free Vegan Nacho Cheese Slices, have no nuts, no oil, no agar, no thickener, no seed, no gluten, no grain. Below sandwich grilled with the slices, recipe coming shortly.
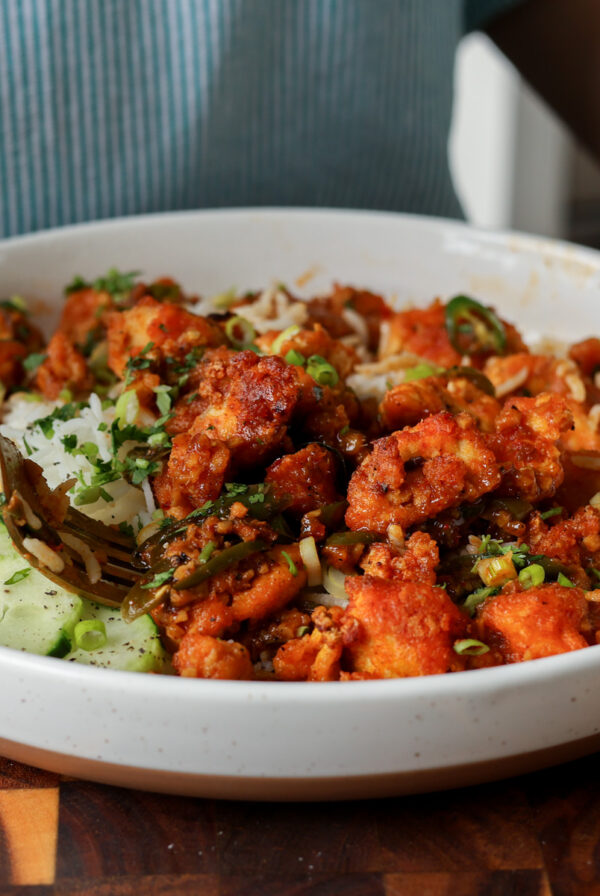
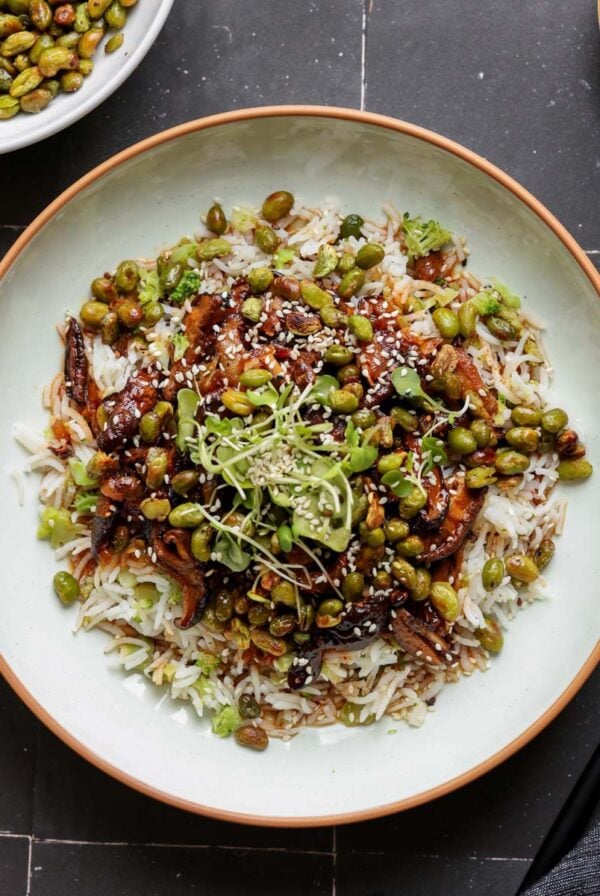
More cheeses to try from the blog
On another note, here is a picture of how easy it is to be vegan these days.
Hubbs to me yesterday: We have a BBQ team picnic tomorrow. Me: you should take something along. Hubbs: the admin(organizer) knows that I am vegan, there will be many options. The last time I ate and went and she was very upset. Me: Rolls eyes. (also he works in a larger tech company. so that makes it even easier).
Steps:
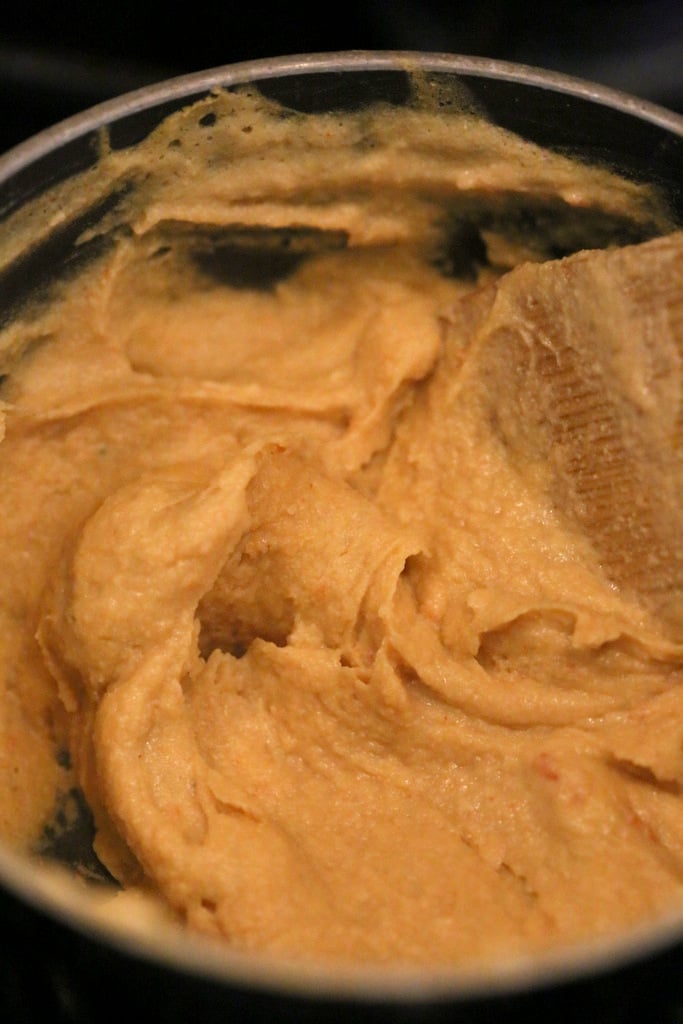
Blend everything and add to pan. Keep cooking and stirring until the mixture becomes a thick even custard.
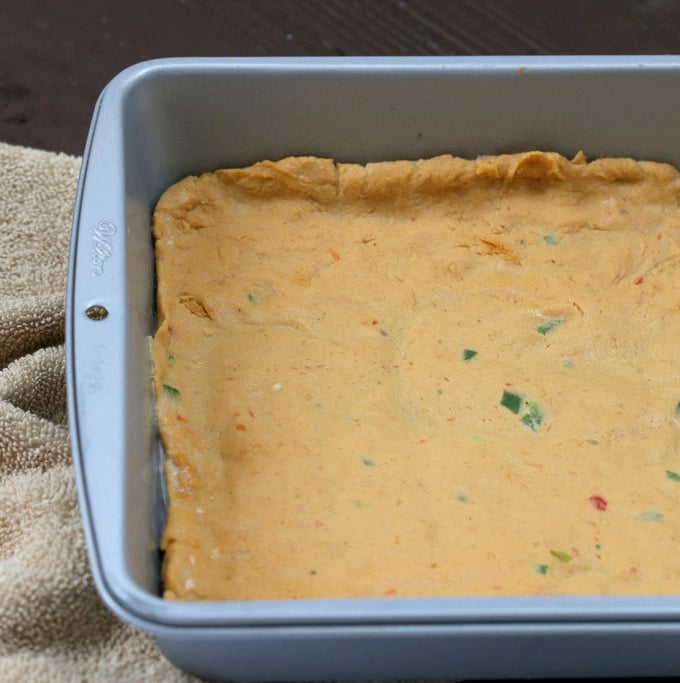
Transfer mixture to a greased pan. Pat down using a parchment. Cool, slice.
Slice and use.
You can make a block and let it set atleast for an hour in the fridge before shredding. It shreds!
Nut Free Vegan Nacho Cheese Slices. Gluten-free Recipe
Ingredients
- 1/2 cup chickpea flour
- 1 garlic clove
- 1/2 tsp each of garlic powder, onion powder, mustard powder
- 1/4 tsp cumin powder
- 1/2 Whole pickled jalapeno, or 2 slices
- 2 Tbsp roasted red pepper , or roasted pimento pepper
- 2 Tbsp chopped tomato
- 1/3 tsp salt
- 1/2 tsp smoked paprika
- 1/2 to 1 chipotle pepper in adobo sauce, use 1/2 tsp chipotle powder if you cannot find gf canned peppers
- 2 Tbsp nutritional yeast
- 1 to 1.5 tsp lemon juice
- 1/2 tsp vinegar, apple cider or white
- 3/4 to 1 cup water
- chopped Jalapeno and pepper flakes
Instructions
- Put everything in a blender and blend until fully combined. Use 3/4 cup water for shredd-able block, 1 cup water for slices.
- Add to thick bottom pan, and heat at medium-low heat. Keep stirring frequently.
- The mixture will start to thicken and get lumpy, then smooth out. The mixture will eventually become custard-like and evenly thick. After the mixture has become a thick even custard, Cook for another 2 -3 minutes to cook the chickpea flour. Stir continuously. You can carefully taste at this point and add salt, spice and tang if needed. * Cook a bit longer if not sure. You want to cook the chickpea flour really well, else it can taste raw (bitter and bad) in the slices later.
- Add the chopped jalapeno and pepper flakes if using and mix in.
- Transfer the hot mixture to a greased brownie pan or parchment.
- Spray oil on top. Place another parchment on top and press to a thin square. or use rolling pin.
- Chill for an hour. Slice and use or store refrigerated for upto 5 days.
- Or transfer the mixture to a greased deep small container. Chill for an hour or more before shredding.
- * You can make nacho cheese sauce with the recipe as well. Use a 1/4 cup chickpea flour with 1 cup of water or non dairy milk. Cook to thicken (about 5 to 6 minutes so chickpea flour gets cooked through, taste and adjust. Use to top nachos!
Notes
Nutrition
Nutrition information is automatically calculated, so should only be used as an approximation.
* If you plan to add more moisture like salsa or more juicy tomatoes etc, use 3/4 cup water to ensure that the cheese sets. The cheese keeps setting as it sits, so keep it refrigerated for for a few hours for sturdier cheese.
* you can change out a few spices or ingredients here and there without affecting the cheese much. Add miso for umami. Use mild peppers etc.
* depending on your stove and pan, you can cook at medium heat, but keep an eye so that the mixture does not stick and burn at the bottom. The cooking time is about 7 to 9 minutes total.


Can’t wait to try this! But how long does the cheese keep for and should it be kept in an airtight container?
yes in air tight container. for upto 4 days refrigerated
Delicious! 🙂
Hi Richa,
Which brand of nutritional yeast is good and how to store for long shelf life.
Thank you,
I use now brand nutritional yeast and store in a cool dry kitchen closet.
Hi, I want to know why you add the yeast to the mixture, and is this the yeast that we but in the bread.
Thanks
its not active yeast that you add to bread. Nutritional yeast is inactive. Think of it like a spice, that adds cheesy flavor to the mixture.
Would love to try this recipe! May I know what is the measurements of the pan you used? Did you pour a single thin layer into the pan so as to form thin slices, thereby removing the the need to cut slices from a block shape?
Hi Mel, i used a 9 by 9 in brownie pan. Yes the cheese is poured in one layer. The mixture will be tick, so you will need to press it using a spatula or hands into a thin layer in the pan. Then let it set. Then just slice and use. You can also roll the mixture out between parchment or spread it on the parchment using a spatula and let it set.
Mmmm this tastes good! I’m just waiting for my slices to set, but the mixture tasted great, and it’s awesome to use chickpea instead of agar. I didn’t have any jalapeno peppers so just added some frank’s hot sauce. thanks for sharing your recipe!
This recipe looks super good I just bookmarked it. I hope to make this when i get a new blender.
A cheaper and tasty cheese for vegans is UNBELIEVABLE!
So good richa.
Makes blocks , slices and sauce so it is the perfect recipe to treasure.
Thank you very much.
Was wondering if I could maybe let this set in a block and run it through a mandolin to slice it, would it be firm enough to hold it’s shape? TIA
Yes, it should be sturdy enough to slice. make sure to use chickpea flour, not besan (gram flour), add an additional tbsp of chickpea flour. This makes a small quantity as a block.
Hi Richa, Why can we not use besan? Chickpea flour and besan are not the same thing..?
Thanks
chickpea flour in the US is white chickpea flour (white chana flour, or chole flour), it is not as fine as besan. besan is chana dal flour which is brown chickpeas(skinned). Besan doesnt set as well. You can use besan here, you willneed to use a few tbsp more besan and the cheese might still be slightly sticky.
Thanks! I ll try it out and let you know how it turns out.
As I didn’t know the difference, I made it with gram flour. It’s still firming in the fridge but I couldn’t wait and tasted a slice!
I probably didn’t cook it long enough as it still tastes a little “raw” like you said in your recipe. I will cook it on low heat with more water and for longer next time. I will also add less acid – maybe just skip the lemon. I tripled the nutritional yeast! And will add even more for a more “cheesy flavor”. I will also try the “chickpea” flour but don’t seem to be able to find it in Europe.
Despite all this – it tastes great! I think the amounts of ingredients is just a taste thing, everyone prefers something else.
What an awesome recipe – thank you 🙂
great stuff, Brikin!! Thank-you. I love your enthusiasm ! chickpea flour if there are any Indian grocers near you or health food shoppes possibly.
I am so looking forward to trying this! Can I grind up dried chickpeas to make the flour? If so what is ratio of beans to final flour? Have you tried this with other bean/legume flours such as green pea? All good blessings on you for this New Year!
Yes you can grind up chickpeas to make chickpea flour. Use a high powered blender. blend one cycle or 1 minute then let the blender cool for a few minutes and blend again. Check the consistency so the flour is not gritty. You can store the flour in an airtight container for 2-3 months.
I havent tried this recipe with other bean flours. Split pea flour might work similarly. Some of the bean flours might coagulate instead of setting.